"Life is either a daring adventure or nothing..." -Helen Keller
 
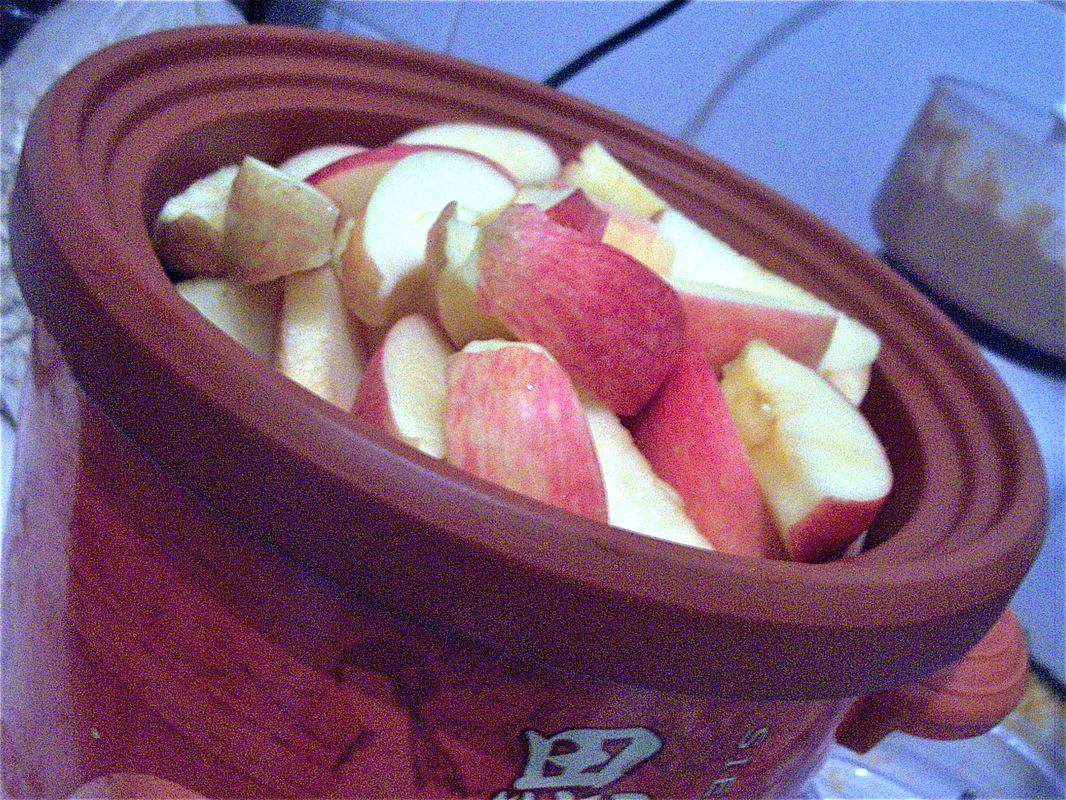
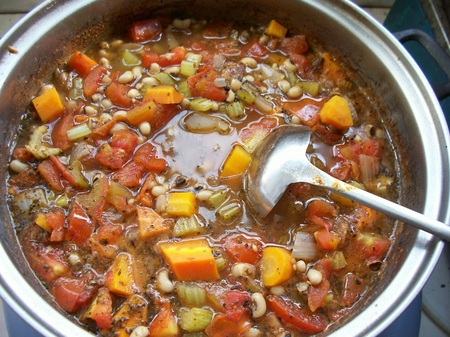
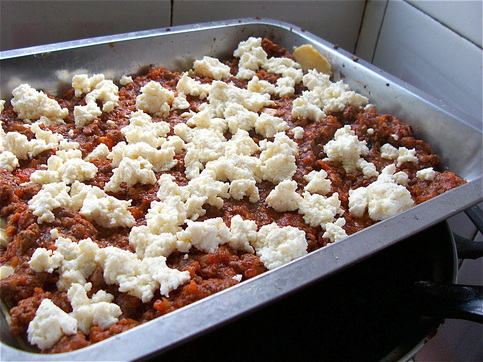
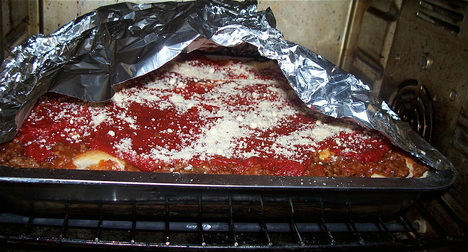
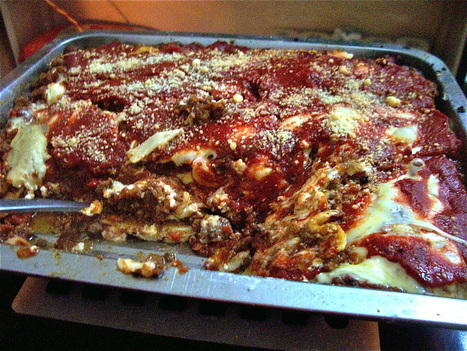
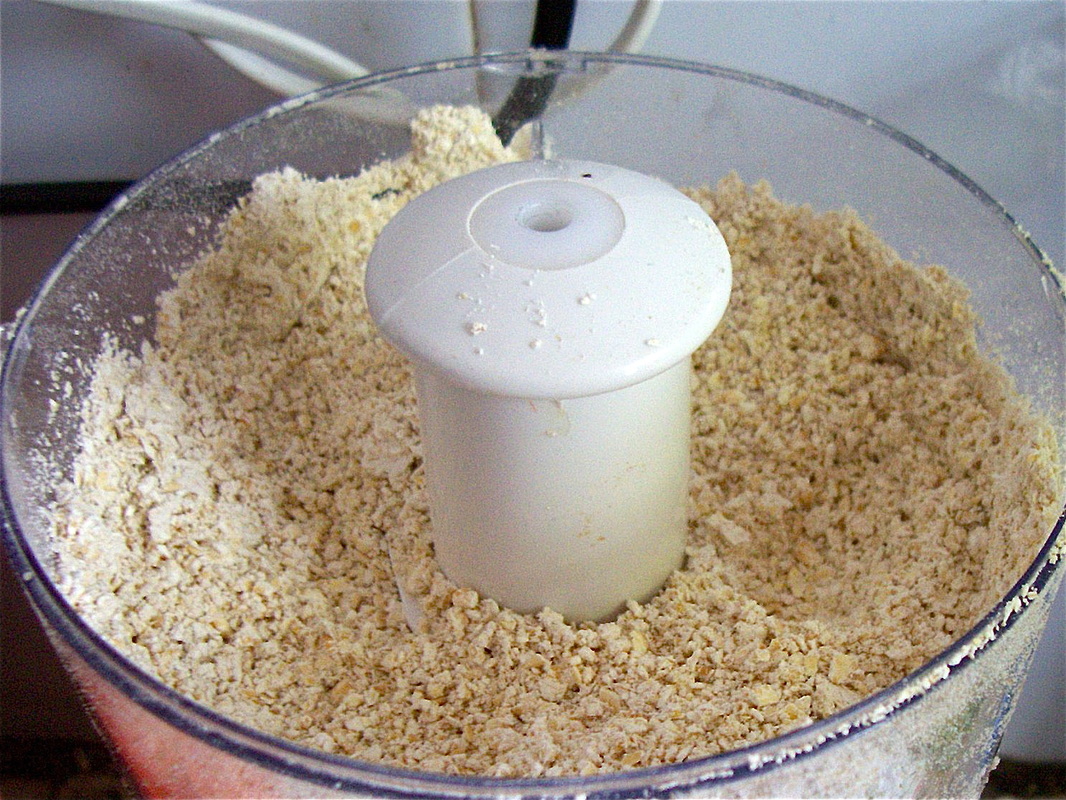
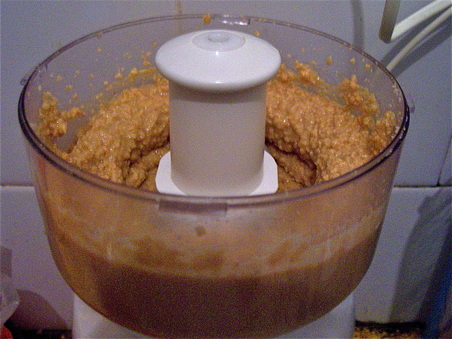
One of my goals during this term is to do more cooking. Another was to incorporate more vegetables into my diet. Eating out is great, and usually ends up being cheaper than cooking at home, but it gets old on the taste buds, and the food tends to be cooked in lots of oil and served alongside mounds of rice.

While stir-fry isn't really going out on a limb and making us feel like we're in America, this still mixed things up a little from what we usually find in the restaurants here, and-- very importantly-- contained no oil. I served this alongside a giant mound of... NOT rice.
Picture
Here's what I used:
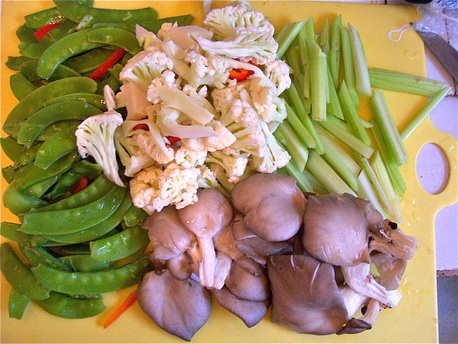
-a bunch of green pea pods
-a bunch of mushrooms (these ended up being great and I should have used more)
-some cauliflower
-several stalks of celery, thinly sliced
-3 Tablespoons light soy sauce
-1/4 cup water
-1 Tablespoon oyster sauce (whatever that actually is... there was a bottle in the fridge and I decided to go for it)
-1 Tablespoon vinegar
-salt to taste

I poured the soy sauce and water into a heating wok and added the cauliflower to give it a head start. After about 3 minutes, covered, I uncovered it and added the remainder of the ingredients (veggies and liquids). I re-covered the wok and allowed it to steam for several more minutes, stirring occasionally until the veggies were cooked but still a little crunchy. I turned off the heat, sprinkled on just a little salt, and served it. This made about 3 or 4 servings, depending on how big your "bunch" of this and "bunch" of that are.

Picture
 
A while back, I made some pumpkin butter. One downfall there was that I didn't yet have a blender, so it didn't have quite the smooth texture I'd imagined, and I tend to be a little overly-sensitive to texture. Another downfall is that pumpkin is not naturally sweet, so a fair amount of added sugar is required, rather than the sweet, natural goodness of this batch of apple butter I whipped up.

During my first year of teaching, a year so close to my heart, I remember the teachers at Wilmore Elementary talking about their crock pots. Conversation clips went something like this:

"Crock pot. The best wedding gift I received."

"I found this great new crock pot recipe..."

"Oh! I put all the meat and vegetables in the crock pot and I forgot to turn it on... I need to go call my husband and see if he can do it."

"Crock pot Wednesdays, they're the way to go. We just get home from work, grab our dinner, and run out the door again."

Sure enough, the crock pot is great. I just filled my crock pot with apple slices. This took 11 apples for me. (I have no idea what kind of apples, just whatever was in the market.)
Then I added about 1 3/4 cups of 100% apple juice. I covered it and cooked it on high for 5 hours, then turned it onto low and cooked it overnight. In the morning, I removed the lid and cooked it about 6 more hours on high until enough of the liquid had evaporated. Here is a picture of what it looked like in the morning, and another of what it looked like in the blender once "enough of the liquid had evaporated."
I waited until it was cool before putting it into my blender to smooth it out. It's amazing how much this batch reduced from the original, heaping-full pot of apples! Anyway, I added about 1 Tablespoon of cinnamon to the mixture and blended it together for just a few seconds. And that was that.

Naturally, the taste of the finished product will vary greatly depending on the variety of apples used. Our apple butter ended up being just a bit tart, but very tasty, especially with the addition of the cinnamon.
Picture
 
With the grand success of homemade peanut butter a few days ago, I decided to try making some cashew-almond butter, something I'd seen on the Internet a while back. The original recipe used a 2:1 ratio of cashews and almonds. I used a 1:1 ratio. This could be why my finished product was just a little more crumbly than I'd have hoped for.

First, I put 1 cup of cashews and 1 cup of almonds in the food processor. Depending on whether the nuts are pre-salted will determine how much salt to use; it will probably need somewhere in the ballpark of 1/4 - 1/2 teaspoon salt.
Picture
Then, as with the peanut butter, I just turned the food processor on high for a while until the nuts became well processed and crumbly.
Picture
After the nuts began to become a bit creamy, the high setting was driving the nut butter up the sides of the food processor, away from the blades, so I turned the processor to a lower setting to finish the job. Adding a little oil or water could help to moisten this mixture, or it could have been my cashew-almond ratio. I think the peanut butter wins for taste, which surprised me but made my wallet happy.
Picture
 
Picture
This was a pretty good soup, though in my opinion, and more importantly, the opinion of my hungry husband, it would have been even better with the addition of some meat. I served this with pasta, giant meatballs, salads, and garlic bread. I modeled this recipe after several similar recipes I browsed online.

Ingredients:
1 Tablespoon oil
½ large onion, chopped
2 garlic cloves, minced
2 stalks celery, cut in slices
2 medium carrots, cut in slices
½ teaspoon salt
4-5 diced tomatoes
3 cups chicken broth
1 tablespoon basil, plus Italian spices to taste
3-4 cups white beans
Salt
Pepper

I started this process by soaking my beans the night before of course, and then boiling them the following day until they were soft like those you'd buy in a can if your supermarket had progressed to canned veggies.

When it was time to make the soup, I just heated the oil and sauteed the onion and garlic for about 5 minutes before adding celery, carrots, and salt and continuing to saute for about 10 more minutes. Then I added the tomatoes and broth and simmered for about 10-15 minutes, until the vegetables were tender. I added the beans and cooked it for about 5 more minutes before seasoning it with salt and pepper.


I love sugar. With a lack of dentists who seem to actually know what they're doing, however, it's time to lay off the sweets. Instead, we've been eating more savory snacks, such as popcorn, China-style beef-jerky, and homemade soft-pretzels. This is great, but there's just one tooth that's left incredibly unsatisfied: THE SWEET TOOTH.

A few months ago, we apparently sent out the request for sugar-free pudding to a bunch of gift-imparting friends and families at the same time and ended up with a supply that could last us a year. (No complaints!) So the other night, when wanting to make a healthy sweet snack, I grabbed a package of sugar-free chocolate pudding and whipped up a sugar-free chocolate banana shake (sugar-free except for the banana's natural sugar, of course).

Ingredients:
3-4 bananas
1 package sugar-free chocolate pudding, prepared
1-2 additional cups of milk

I just hit the "on" button on the blender and moments later had a nice, thick shake. Rich in calcium, rich in potassium, and, most importantly, rich in a good sweet taste.
Picture
 
Picture
We love Italian food. When asked which country we want to travel to (a common conversational question here), without a doubt, we reply, "Italy." Dangle the possibility of good Italian food in front of us, and we'll come running. Now the Pizza Hut an hour and a half away can whip up a decent plate of pasta, but the portion sizes are SERIOUSLY lacking! I wanted to make something really special for us, so I decided to make lasagna. Now, with no lasagna noodles, no tomato sauce, and the only cheese in town being some wimpy cheese singles, I knew I needed to get down to work, so I rolled up my sleeves for a day in the kitchen.

First, the cheese:
Let's be honest, what's Italian food without cheese? I took a quick look in the freezer and pulled a pack of 50% less fat cheese singles out. Then I checked the fridge and pulled out a container of Italian cheese from our wonderful families in America. We'd made some cheese here before, so I decided to try that again.

Our milk comes in juice-box containers (so gross, I know!). Each container is about a cup. I used 1 container of whole milk, and 4 containers of "low-fat" milk, with a little less fat than 2% milk in America and unfortunately the lowest fat milk we can buy here.

I poured these boxes of milk into a pan and began to heat it over low heat, constantly stirring the milk so it would not burn. It took about 20 minutes or so for the milk to begin to thicken and come to a boil. Once it boiled, I immediately turned the heat off and added 3 Tablespoons of freshly squeezed lemon juice, stirring for another minute. Then I covered the pan and allowed it to sit for 2 hours.

Two hours later, the milk had separated into curds and whey. I strained the mixture through a cheesecloth (or lint-free, non-fuzzy towel). I sprinkled in about 3/4 teaspoon of salt and mixed it up. Squeezing the cheese more makes it harder; I decided to squeeze less in an effort to get some cheese about the consistency of ricotta cheese. (There really isn't any way I've found to make better cheese without more specialized ingredients and tools.)

I let the cheese hang from a hook over the kitchen sink for any extra drainage to occur until I was ready to use it.
For the sauce:

1.5 lbs ground beef
1/2 onion, chopped
small green pepper, chopped
about 15 small tomatoes (when blended, this should be about 1.5 blenders full)
2 t. oregano
4 t. Italian seasoning
2 t. garlic powder
1 t. salt
2 t. white vinegar
1 T. apple cider vinegar
2 T. sugar

Austin loves meat and doesn't often get enough when we eat out, so I ran to the market and picked up a pound and a half of lean beef and had it ground. I browned this beef, drained off whatever fat remained, and then transferred it into another pan while I cooked 1/2 a white onion (diced) and a very small green pepper (also diced.) After they browned, I added the ground beef back to the pan and cooked them together for about 3 minutes.

I then added this to a larger pot which already contained about 15 small tomatoes, blended. I also added the spices above and the vinegar, plus or minus whatever spices were needed to tweak the taste to our liking. I also added about 2 T. sugar.

Then I set this aside onto the stove top to simmer for about 45 minutes until it was nice and thick.

Now, for making the noodles. I'd done this once before, but in Austin's mom's beautiful kitchen with a pasta machine. Her pasta machine was great. Here's a picture of mine:
Picture
Still, a new kitchen appliance is always fun, even if it's just a piece of wood. This whole process took a little while but was actually a fun experiment.

For the noodles:
2 cups flour
3 eggs
1/2 teaspoon salt

I mixed these things together and kneaded for about 5 minutes. It was really tough, unlike bread dough, so the "kneading" was just kind of like pulling and playing with it.

Then I made it into 3 balls and let it rest on the counter for 15 minutes. (There's no telling what diseases it might have picked up during those 15 minutes in our kitchen.) After 15 minutes, I took my rolling pin to it and rolled it until it was really thin. My aim was 1/16 of an inch thick. I think I succeeded on some parts of the noodles, and not so much on others. Nonetheless, I rolled until I had about 9 roughly lasagna shaped noodles then used a squiggly attachment from a grater I had to make the edges look a little more like lasagna noodles you can buy.
Now, to assemble the beast. This was the most fun, and the least labor intensive. I loved it.

Here are the layers I put down, from bottom to top of our 9 x 13 -ish pan.
1. about 1.5 cups of sauce to coat the bottom generously
2. three lasagna noodles, lengthwise on the pan
3. more sauce, generously
4. half of the homemade cheese ball, in dollops (that's a fun word!) across the lasagna
Picture
5. a sprinkle of Parmesan cheese
6. a layer of greens

Picture
7. another round of noodles
8. more sauce, generously
9. the rest of the homemade cheese, in dollops of course, with another sprinkle of Parmesan
10. a layer of 50% less fat cheese singles; (they're really thin here)
11. the last 3 noodles
12. more sauce
13. some more cheese singles (I just put these over 1/2 of this top layer)
14. another sprinkle of Parmesan

And that's a wrap. I made a tinfoil tent over the top and baked it at about 400 degrees F for about 40 minutes. I cooled it for about 5 minutes before serving to myself and my very happy best friend!
Picture
Picture
 
I don't know if this is even considered a recipe. The product isn't necessarily directly edible, but here we go.

During college, there were a few years when my body wasn't processing gluten very well, so I started using other types of flour, such as rice flour, oat flour, buckwheat flour, etc. Besides not being the best for baking, these little bags of flour were so expensive! Well, they're still not the best for baking, but recently I've been able to beat the price by making my own "oat flour." It's not as fine as regular oat flour you can buy, but it's much cheaper and works well in many of my recipes, especially now that I can eat regular flour again and just substitute a small portion of the regular flour for my oat-flour creation. A little more fiber, a touch more flavor, at almost no extra cost.

First, I usually buy a big bag of oats or two. I buy the old-fashioned kind. We use the instant old-fashioned oats for making breakfast in the morning, but I usually buy the not-instant ones for making oat flour, because they're much cheaper here. I put them into the food processor a little at a time and process them on high for a minute or two, until they don't seem to be becoming any more fine. They look a little like really fine sawdust when finished, but they're a great way to subtly slip the fiber and whole grains into some recipes when we don't have access to whole wheat flour.
 
Pancakes. A good, solid breakfast food. Why not top it off with a good fruit syrup? We were originally going for healthy, so we de-seeded and blended up a bunch of grapes, then boiled them down into a nice, thick syrup. The only problem was that the syrup was a little tart. Goodbye, healthy. Hello, chocolate!

I made the same pancakes I usually do, with:
1 cup white flour
1 Tablespoon sugar
1/4 teaspoon salt
1 Tablespoon baking powder
1 cup ground oats (I just blend them in the food processor until they're somewhat powdery.)
2 eggs
milk until desired consistency

I mixed these together and cooked them on our always-exciting, flame-shooting gas stove.
Picture
Then I took the remaining grape syrup from a few days before and added just a few chocolate chips and about a tablespoon of honey. I stirred this on the stove top for just a minute until the chocolate melted. This was fantastic. Chocolate-covered fruit in syrup form. It's what's for breakfast.
Picture
Picture
 
Who knew making peanut butter was so easy? Certainly not me. With the recent conviction to stop eating sugar (as much as possible) for the sake of our teeth, I decided to try making some homemade peanut butter, all natural, no sugar. It was one of the easiest things I could have made; I wonder why I didn't try this before.

First, I bought some peanuts:
Picture
Then, I put two cups of peanuts into the food processor along with 1/2 a teaspoon of salt:
Picture
Finally, I hit the process button. I used a high setting at first and moved to a low setting later. After about a minute, the peanuts were in small pieces. About a minute or two later, they started coming together into a paste. I left ours kind of chunky. It was great on bananas and apples for dinner!
Picture
 
Picture
With the recent arrival of cheese singles in our town, we had to implement a grilled cheese and tomato soup night. Granted, the cheese are merely singles and the bread has a sweet, Chinese-y taste, but it's still more than a little comforting to dip a grilled cheese into some tomato soup and eat up.

I used the new blender to blend up some tomatoes, about 8 or 9 of them, along with two cups of water. After this was blended pretty well, but still a little chunky, I poured it into our soup pot and began to boil it. I added about 3 Tablespoons of chicken bouillon granules and stirred it until the granules dissolved.

After it had boiled/simmered for about 30 minutes (or until thick enough), I added some black pepper, Italian spices (lots of basil!) to taste, and some stalks of cilantro. (In the future, I'll be blending the cilantro with the tomatoes.) I allowed it to simmer about 5 minutes more and called it a meal. Simple, entirely un-extravagant, but satisfying.

Picture
Picture